The sack or robe à la francaise had loose pleats at the back of the neck and an open front. It was a style that dominated women’s fashions during the 18th century. It developed from a loose negligee but by the 1770s it had become a more formal type of dress and would have been worn for attending assembly rooms, dinner parties, the theatre or the opera.
This is a very rare example of the use of velvet in 18th-century women’s dress. Normally fabrics are printed after the weaving process. In the chiné technique, the warp threads are printed before, and during weaving the slight pulling of the threads gives the pattern a blurred effect, resembling a watercolour when finished. In this extraordinary example, the chiné process has been combined with velvet - a difficult technique that was produced only in a few places in France. The silk for this fabric is reputed to have cost 36 shillings a yard. With an average of 17 yards required for a sack and petticoat of this style, the fabric would today cost about £2,200.
Fixing my Robe à la Polonaise to make it more ✨historically accurate ✨
With every project I do, I learn more and more about techniques, sewing, and dress history as a whole. So there’s no surprise if I look at an older dress I made and find all kinds of mistakes that need fixing, and I know even in a few months I’ll look at my current projects with the same criticism. Just know that the obvious mistakes are something I’ve been very much aware of since I made it, I just added a fichu because I didn’t know how to fix it.
Here’s the dress. You can immediately tell that something went terribly wrong with the neckline, but there are also some issues with the undergarments that I’m going to deal with.
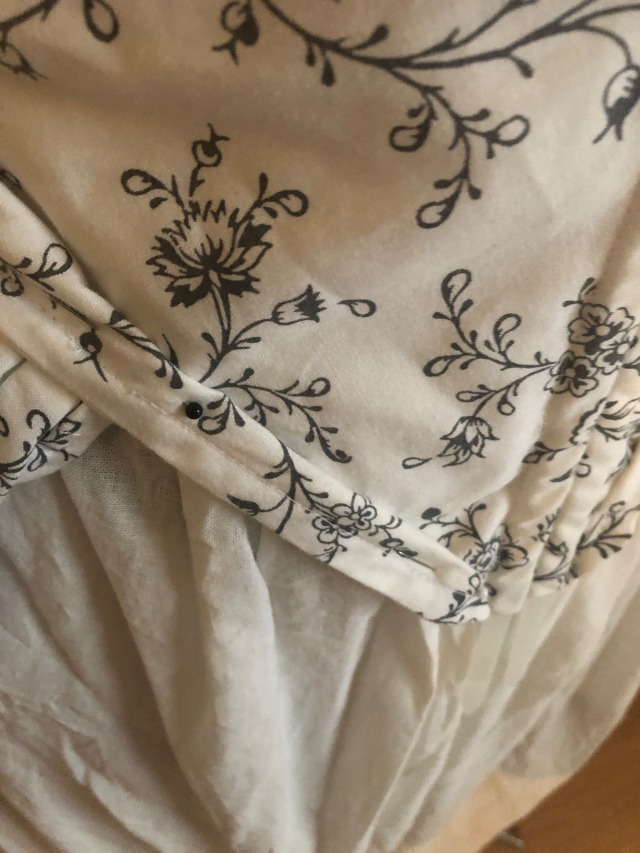
I made the mistake to cut the neckline straight when it should have been slightly rounded, that’s why it slopes up in the middle. For that, I’m taking out the boning in the front (and later replacing it with actual synthetic whalebone) and folding that slope over to make it rounder. This will however create an even lower neckline which is also one of the many flaws of this dress, so that’s what I dealt with next. Another problem that I had was with one of my sleeves. The right sleeve (left in the picture) wouldn’t lie flat on my shoulders. I have no idea how that happened as I cut both sides the exact same but it’s something I needed to fix so I folded this part over on the inside and stitched it in place.
I did this on both sides so I could raise the neckline as well.
Then I noticed that the front of the bodice wasn’t laying flat, and I noticed that it’s probably too long. I folded the bottom seam over until I felt like it looked flatter and stitched that in place as well. It does look a bit awkward and is not the historically accurate way to fix it, but you can’t really tell from a distance so for the sake of facing my mistakes to practice it was good enough.
The gown still has many more issues that I’d need to make a new one to really make it work so I only tackled the most obvious parts.
There was this big fold in the back that I planned on fixing by resewing the side seam but for some reason after fixing the front it wasn’t so bad after all so I left it as it was.
Now to the petticoats. They’re fine overall, but I didn’t use bands for the ties, I made a tube out of the same fabric, which made it super bulky when tied. And since you have like, two or three of those underneath the actual gown it could make it look a little bulky in the waist area, which I wanted to avoid so I bought some cotton bands about a centimeter wide and replaced all the ties.
This is the fixed dress for now. The back is very boxy so I might resew the side seams after all but this is it for now.
Like I said, to fully fix it I’d just have to make a new one and I will eventually but probably in the distant future as I have many more projects that I want to do. But all in all I can say that I’m really glad I fixed this dress as best as I could because like I said, every project is a big learning experience and fixing something even more so. This way I can make sure I won’t make the same mistakes again!
My design for Justine Moritz from the novel Frankenstein by Mary Shelley ♥
It was very interesting researching what working women wore in the 18th century and I ended up having so much fun designing her! :) (And then redesigning her a few dozen times too!! XD )

, 1775 - 1780 (sewing), 1870 - 1910 (altered) The sack")
, 1775 - 1780 (sewing), 1870 - 1910 (altered) The sack")
, 1775 - 1780 (sewing), 1870 - 1910 (altered) The sack")
")
")
")
")
")
")
")


 c. 1760")
 | French | The Met")
 | French | The Met")
 | American/European | The Met")
 | American/European | The Met")
 | American/European | The Met")
 | American/European | The Met")